Tag Archive for: blood

ASCLD – American Society of Crime Laboratory Directors.

AFIS – Automated Fingerprint Identification System. Palmprint storage and search capabilities are also in place.

ALPS – Automated Latent Print System.

ASCLD/LAB – American Society of Crime Laboratory Directors/Laboratory Accreditation Board.

Acid Fuchsin – Reddish protein stain used to enhance bloody friction ridge detail of fingerprints.

Acid Yellow 7Fluorescent dye stain used to help visualize latent prints left in blood on nonporous surfaces.

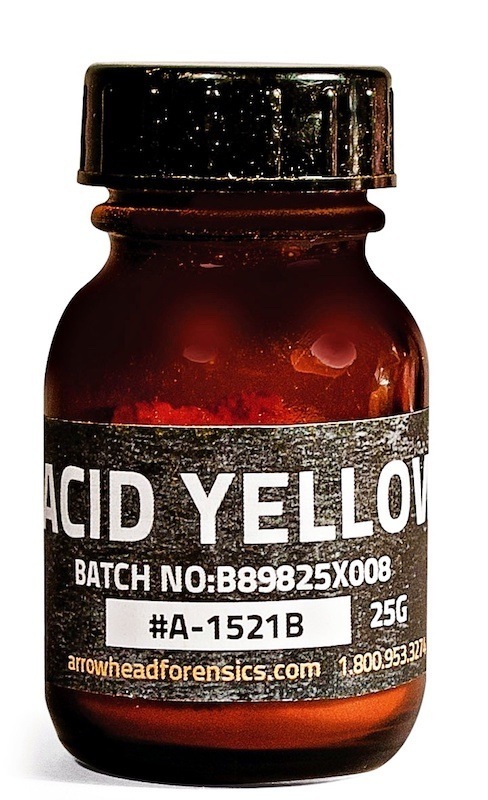
Acid Yellow-7, Arrowhead Forensics

Acidified Hydrogen Peroxide – Solution used to develop friction ridge detail on cartridge casings by etching the surface of the casing not covered with sebaceous material (oils and/or fats).

Adactylia – Congenital absence of fingers and/or toes.

Adermatoglyphia – Extremely rare congenital absence of fingerprints.

Alanine – The most common amino acid found in proteins. Alanine is often
used to test latent print chemicals for an amino acid reaction.

Aluminum Chloride – A metal salt used to treat ninhydrin developed latent prints.

Amicus Brief – Legal document filed by someone not associated with a case but possibly has knowledge of a subject matter that may be of interest to the courts.  The person submitting the brief is known as amici curiae.

Amicus Curiae – Latin for “friend of the court.”

Amido Black – Bluish-black stain used to enhance bloody fingerprint friction ridge detail.

Anhidrosis – Medical condition that reduces or prevents the body’s ability to sweat.

Benzidine – Once described as the best technique for developing bloody latent prints on nonporous items, Benzidine has been linked to cancers and is no longer used.

Bichromatic ™ – A multi-colored powder used to process an object for fingerprints.

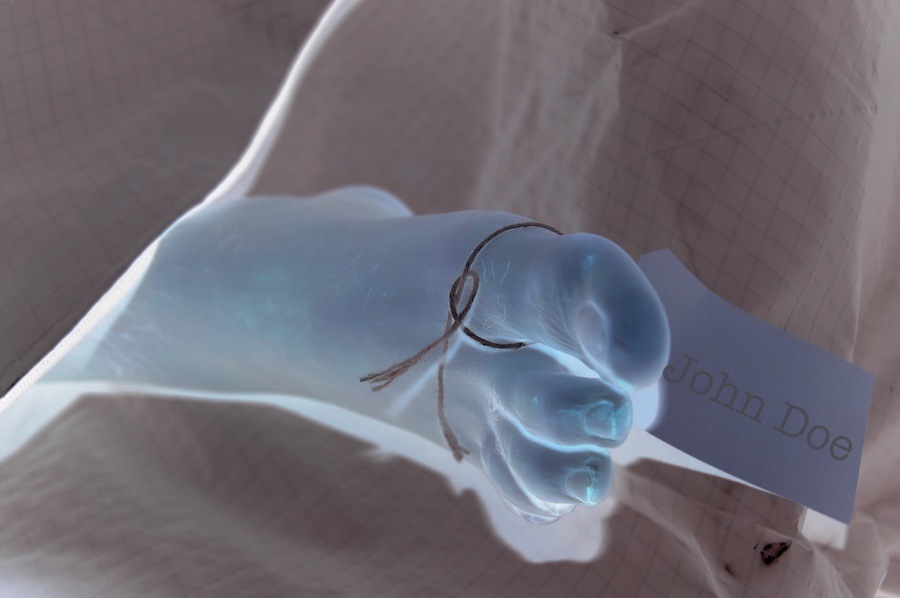
Boiling – Method used to re-hydrate the friction skin/fingerprints/footprints of a deceased person. To process the prints water is boiled and them removed from the heat. The hand of the deceased is submerged in the water for approximately five seconds. The skin is then dried and the fingers and/or palm is printed.

CJIS – Criminal Justice Information Services Division.

Calcar Area – The area located at the heel of the foot.

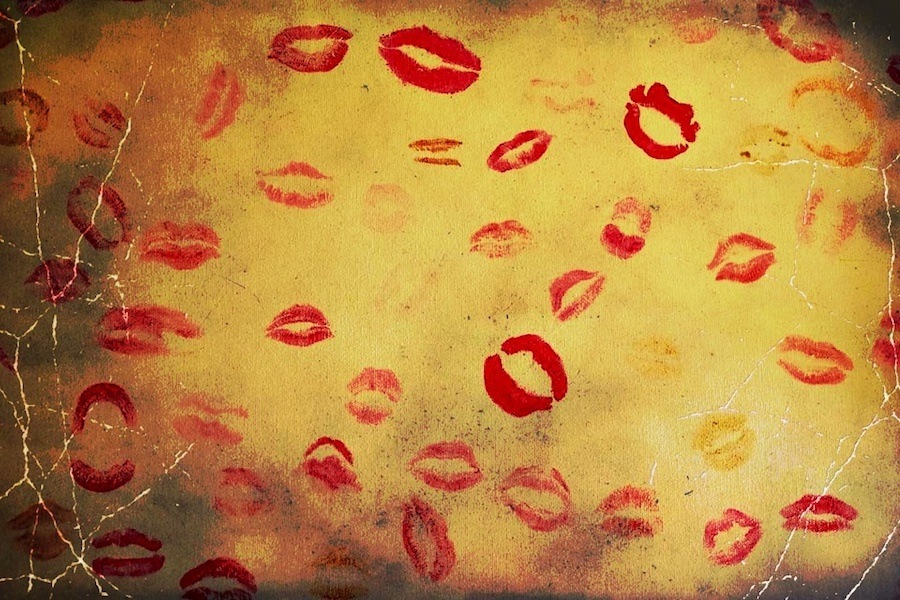
Cheiloscopy – The study of lip prints.

Clandestine – In secret.

Cluster Prints – More than one fingerprint grouped/clumped/positioned in the same spot of a surface.

Comparator – A split image projection screen used to view and compare fingerprints.

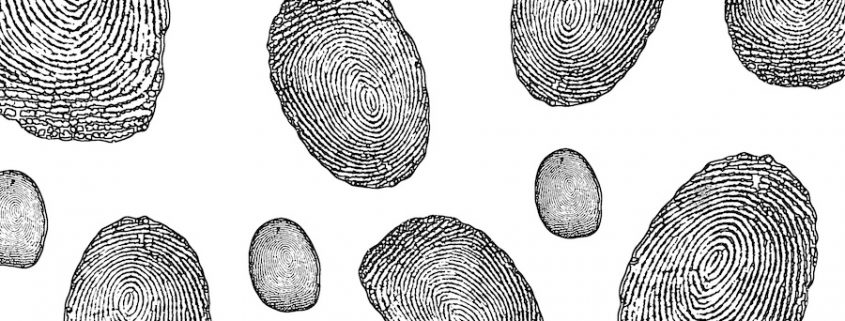
Core – Center of a fingerprint pattern.

Dactylography – The study of fingerprints as a method of identification.

De-gloving – The accidental/unintentional separation of the skin from the hands or feet. This “skin slippage” often occurs after a body has been submerged in water for a period od time.

Diff-Lift™ – Fingerprint lifting tape made especially for use on textured objects.

Dorsal – The backside of the hand.

Erroneous Exclusion – Disregarding evidence without a sound basis for doing so.

Exemplar – The known prints of a known individual.

FLS – Forensic Light Source. Includes all light sources used in forensic examinations.

FRE – Federal Rules of Evidence.

Fingerprint Society – Yes, it’s a thing. The Fingerprint Society was conceived in 1974 by Martin J. Leadbetter.

Genipin – A reagent used to develop friction ridge detail on porous items. The result is a dark blue image that can be seen without enhanced lighting.

Hallux – A person’s big toe.

Sir William James Herschel – The first European to recognize and utilize the value of fingerprints for identification purposes.

Histology – The study of the microscopic structure of animal or
plant tissues.

Hot Breath TechniqueBreathing on a latent fingerprint either to help visualize the print or to add moisture back into an older latent print. Also known as Huffing.

Hyperhidrosis – Medical condition that increases sweating. Sometimes caused by certain medications, or heredity.

Hypohidrosis – Medical condition that decreases sweating. Sometimes caused by certain medications, or heredity or damage to the skin.

IAFIS – Integrated Automated Fingerprint Identification System. The FBI’s first
fully automated AFIS computer database.

Image Reversal – Occurs when the friction ridges in a latent print are reversed. Unintentional transferred prints could occur when using rubber lifters. It’s even happened when items are stacked on top of one another (stacks of evidence bags, for example), causing a print to transfer from one item to the next. The same is true with books. A print from one page could transfer to the next page (after the book is closed for a long time). These prints are mirror images and should be obvious to a trained examiner.

Latent Print – Print that is visible to the naked eye.

Liqui-drox – Fluorescent (yellow) solution used to enhance/develop fingerprint friction ridge detail on the adhesive and non-adhesive sides of dark colored tape.

Loupe – Small magnifying glass used to examine prints.

There’s more to evidence collection than merely bagging and tagging bloody clothing and spent bullet casings. Crime scene techs are highly trained, skilled members of police agencies and forensic laboratories who more often than not provide the keys to solving cases.

In the “good old days,” many officers, including patrol officers, collected their own evidence (some still do, especially in smaller departments). They plodded into and poked around crime scenes, determining what items they thought might be of some value and then tossed those things into some sort of container—a grocery bag, department envelope, cardboard box, and even the cellophane wrappings from cigarette packs. In those days there wasn’t a lot of consideration for sterility, and DNA hadn’t yet made its way on the “scene.”

When investigators finally discovered plastic sandwich and ziplock bags you’d have thought they’d won the lottery, because packaging evidence had suddenly become a breeze. The problem with those new-fangled containers, though, was that detectives were placing everything in them, not knowing they could be destroying or damaging evidence instead of preserving it. And that brings us to the question of …

Paper or Plastic?

There’s a simple rule of thumb for deciding which type of evidence packaging—wet evidence goes in paper containers (wet evidence can degrade if placed inside plastic containers) and dry evidence goes in plastic. Items that could be cross-contaminated must be packaged separately. There’s a rule of thumb for other types of evidence, too, and here’s a handy list for the proper packaging of those items.

Hair – Double packaging in paper is best. However, if the hair is completely dry, plastic will work in a pinch. Hairs recovered from different locations must be packaged separately and labeled accordingly. Tape all packaging seams.

Fibers – Dry, and tape-lifted, fibers may be placed inside plastic containers.

Rope, twine, and other cordage – Paper or plastic.

Paint chips – Place inside folded paper. Then place the paperfold inside an envelope.

Tools – Paper or cardboard.

Tape – Wear non-powdered gloves when handling tape. Submit samples inside plastic. If the tape is stuck to an item the item must be submitted with the tape still attached. Do not remove the tape!

Glass – Wrap in paper. Smaller pieces may be placed inside appropriate size cartons.

Arson and other fire evidence – Airtight metal containers. Unused paint cans work best.

Dried stains – Wrap stained item in paper or place inside cardboard box. Large items – moisten swab with distilled water, swab the stain, and package in paper or cardboard after drying.

Blood – Allow to air dry and then package in paper.

Evidence drying lockers

DNA – Do NOT use plastic!
And when I mentioned that wet evidence is packaged in paper containers I did NOT mean to pour liquids into paper bags. Instead, items that contain wet evidence (bloody and/or semen-stained clothing, etc.) should be placed into paper containers.

Detective Sergeant Carl Catchemall studied the bloodstain pattern on and next to the ticking cow clock hanging on the kitchen wall. He stood there, staring, for what seemed like an eternity before turning toward his partner Hank Handsup. Then he tipped his bald, oval-shaped head back toward “the cow wall” where reddish splotches and dots of once-oozing blood contrasted sharply against the freshly painted, snow white surface. The cow’s tail moved from side to side with each tick and tock of the timepiece.

Tick Tock …

“I believe, Hank,” said the wise detective, “that our killer was right-handed, shorter than your own meager five-and-a-half feet, and was standing, not sitting, quite close to our victim, poor Mrs. Ima Ghostnow, when he pulled the trigger on what was most likely a revolver. That, my friend, is what I believe happened to our unfortunate victim.”

Tick Tock …

In the real world, to reach such a solid conclusion, it’s a must that detectives conduct a comprehensive bloodstain evidence investigation, using proper tools, techniques, supplies, equipment, and training. And, of course, experience always helps.

A good bloodstain training class typically uses actual blood, because nothing else accurately mimics the real stuff. Although, a decent substitute for the real deal is a mixture of Karo syrup and red food coloring.

During training classes students are exposed to nearly every type real-life scenario imaginable, but the first order of business is to learn the basics—characteristics of a blood drop.

Characteristics of a blood drop

– blood drops are formed by gravity

– blood drops cannot break apart unless contacted by an outside force

– larger drops travel further than smaller drops (due to mass, not size)

– blood drops always travel in an arcing path (impact injuries)

– size ranges from a few millimeters to few centimeters

– volume of a drop of blood is in direct proportion to whatever it’s dropping from (ax, stick, arm, leg, etc)

Crime scene investigators typically measure bloodstains that hit surfaces on the way up, not stains made by blood that’s on its way back down. Stains made when traveling upward are much more accurate for use as evidence because gravity is not as much of a factor in the pattern’s formation.

Types of Bloodstain Patterns

Impact – caused by high-velocity or medium-velocity wounds—gun shots or blows by an object such as a baseball bat or hammer.

Swipes (Wipes)Caused by a bloody object being wiped across another surface. These stains are the reason for changing the name of the examination from “blood spatter” evidence to “bloodstain” evidence (not all patterns are caused by airborne drops of blood).

*Remember, terminology could and often does vary from one area to the next.

The Lingo

Cast-Off– Caused by slinging blood off objects in motion (a swing of a bloody hammer, or arm).

Drip and Flow– Caused when blood drops off one object onto another.

Projected– Caused by arterial spurts. Often seen in stabbings and cuttings.

The ability to effectively interpret bloodstain patterns is a science and an art. But, before investigators can dive into a crime scene, they must learn a bit of terminology, such as:

Angle of Impact– the angle formed between the direction of an individual drop of blood and the surface it strikes.

Back Spatter– blood that’s directed back towards the source of energy, such as a hand holding a firearm, or hammer.

Expirated blood – blood that’s forced from the mouth or nose where air (exhalation) is the propellant.

High Velocity Impact Spatter (HVIS)– bloodstain pattern caused by a high velocity impact, such as those caused by gunshots or fast moving equipment or machinery (saws, drills, etc.)

Point of Convergence – the point (two dimensional) where the direction of travel (blood droplets) intersect. Can be used to help determine where the victim was standing when the fatal injury was delivered.

Point of Origin –the point (three dimensional) where the direction of travel (blood droplets) intersect.

Stringing – a method used to determine the point of origin. Investigators tie strings at the blood drops, following the direction of travel. The point where the strings intersect is the point of origin. Lasers are sometimes used in lieu of strings.

Stringing You Along!

So what are the tools needed to conduct a proper investigation of bloodstain evidence? Well, for starters …

Luminol

Luminol is a chemical that exhibits a bluish-white glow (chemiluminescence) when mixed with an appropriate oxidizing agent. It reveals the presence of iron in hemoglobin, even in the slightest traces of blood found at crime scenes. In fact, Luminol is capable of detecting blood even if it’s been cleaned away, and in situations where the scene has been altered to the point where there’s no indication that a crime was committed. The older the stain the more intense the reaction will be. By the way, Luminol is not recommended for use on visible or wet blood, and the area must be photographed prior to it’s use because the glow tends to fade quickly.

Photo – Sirchie

When your fictional detectives find themselves searching a property with hopes of locating blood evidence, here are some places they should look: kitchen and bathroom sinks and their drains. The same for tubs and toilets. The cracks between moldings and walls and floors, and at the base of tubs and toilet tanks, drains, cracks and crevices of wood. In addition, tile floors, grout, carpeting (beneath carpeting, especially if the carpeting appears to have been freshly cleaned), dirty laundry, hampers, bedding, ceilings, lampshades, beneath table tops and chairs, mops and mop buckets, sponges, door handles and knobs, knife blocks and, well, the list is as broad as the imagination allows.

When using Luminol to detect the presence of blood, it’s best to turn off all lights before applying it to the suspected/targeted area.

Keep in mind that chlorine bleach flashes brightly when contacted by Luminol. This is a sign that someone may have attempted to clean the area. It’s also important to note that iron and copper particulates will react with Luminol, giving a false positive for a suspected presence of blood. As always with presumptive testings (drugs, etc.), a laboratory test is required for confirmation or exclusion.

Other false positives for Luminol include iron and copper particles. Luminol is a blood search tool, and suspected blood areas must be confir

Luminol has been found to deteriorate DNA evidence, therefore DNA evidence should, if possible, be collected and preserved prior to the use of Luminol or similar products, such as BLUESTAR.

Photo – Sirchie

BLUESTAR is also used to determine the presence or absence of blood. However, what sets BLUESTAR apart from Luminol and other blood reagents is that its use doesn’t require total darkness, nor does it deteriorate DNA. Another benefit to BLUSTAR use is that the color, intensity and duration differs from that of Luminol. Therefore, investigators are less likely to confuse blood and false positives.


Bloodstain Pattern Investigations at the Writers’ Police Academy and MurderCon

This fall at MurderCon, instructor David Alford is scheduled to present a fantastic and wonderfully detailed hands-on class about bloodstain pattern investigations, called The Art of Blood. Here’s a “first look” at the workshop.

“Violent crimes and accidents frequently involve the interpretation of blood evidence. This class offers the attendee the opportunity to learn how to determine the velocity and angle in which a bloodstain impacted a surface, and the 3-dimensional point of origin – where injury or bleeding event occurred . The instruction will include presumptive testing techniques of stains thought to be blood, as well as, searching crime scenes for latent blood with luminol when circumstances dictate that the area was cleaned by the perpetrator. Attendees will participate in hands-on activities to reinforce the learning objectives.”

About MurderCon/Sirchie instructor David Alford:

David Alford is a retired FBI Special Agent with 21 years of experience investigating violent crimes, terrorism and other cases. He was one of the founding members of the FBI Evidence Response Team(ERT)and conducted crimes scene searches on domestic and international violent crimes and bombings, including the Polly Klaas kidnaping and murder, the Unabomber’s cabin and the 9/11Pentagon scene.

He worked in the Denver and San Francisco field offices and completed his career at Quantico in the FBI Lab ERT Unit.During the 6 years in the FBI Lab, he was primarily responsible for overseeing and teaching basic and advanced crime scene courses throughout the US and many other countries. In the 6 years before the FBI, he was a Forensic Serologist, Hair and Fibers Examiner and Bloodstain Pattern Analyst for the Kentucky State Police Crime Lab.After retirement, David taught crime scene courses around the world on behalf of the FBI and US State Department.David has been with Sirchie as an instructor and sales representative for Sirchie’s RUVIS and ALS products for the last 10 years.David loves teaching and allowing students to learn through hands-on training.


Below, 2018 Writers’ Police Academy instructor RJ Beam details bloodstain patterns and why how they’re formed.


Speaking of MurderCon, there’s a murder to be solved there and it’ll be up to you to crack the case by using clues and evidence gained and gathered at the event. Oh, my, it’s going to be a “killer”!!

Details to be announced when the all new website goes live later this week. Registration is scheduled to open this month. Sign up date also to be announced later this week.

It’s exciting, and due to the new format space is extremely LIMITED. So be ready!!

Writers’ Police Academy presents MurderCon


Have you ever read what you thought was a fantastic book, the kind that forces us to read into the wee hours of the morning, not wanting to stop because the writing is so doggone good? But then on page 1,617, well, there it is, the sentence that makes us scream like the shopper on Black Friday who lost the last 100-foot-flatscreen Kawasaki Supersonic television to the old lady with the great left jab who immediately zipped over to the checkout counter on her suped-up Hoveround with YOUR TV strapped to her back.

Yeah, you know those books. The stories written by the author who figured no one would notice that he didn’t know the difference between a revolver and a semi-automatic pistol. Or that cordite hasn’t been used in the manufacturing of ammunition since the last days of WWII. Yep, those books.

We’ve all heard (over and over and over again) about fake news, right? You’ve even heard me mention the nonsensical reporting so often seen floating around the internet. Well, the use of incorrect firearm and other forensic terminology and information has the same stink to it as does the news reporter who kneels down in a shallow puddle of water to make it seem as if he’s standing in raging floodwaters.

So let’s have a fresh start today and we’ll do so by clearing a bit of the stinky faux pas from our writing. We’ll begin the funk-cleansing by quashing a few details about blood evidence. First, up …

Some writers have their crime-solvers rush into a murder scene while soaking the area with a luminol-filled power washer. They spray and spray until every surface—walls, ceilings, and even the family dog and Ralph the goldfish are dripping with the glowing liquid.

Others, well, their detectives have the uncanny ability to merely look at blood droplets and immediately know its type and what the bleeder had for dinner and the exact time the red stuff spattered the family portrait hanging above the mantle.

You put your left eye up, you put your left eye down.

You put ’em both together and then you look all around.

That’s what it’s all about!

~ Sung to the tune of The Hokey Pokey.

So, as the peppy little jingle above indicates, investigators should always examine a scene visually before taking the first step inside. This includes looking up. See if there are bloodstains there. Any brain matter? Bullet holes? Insects?

Next, the walls and for the same items of evidence and/or clues.

The floor and the body, if that’s where it was found. Of course, the victim should be the first concern. After all, he or she just might still be alive and need prompt medical attention. Oh, and a quick check for the suspect is always a good idea. No need to take a bullet or stab wound in the back if not absolutely necessary. Priorities!

Then look all around, and do examine the smallest of details. Evidence, as any seasoned investigator will tell you, is sometimes found in the most unlikeliest of all places.

Crime-scene searches must be methodical and quite thorough. Every single surface, nook, and cranny must be examined for evidence, including doors, light switches, thermostats, door knobs, etc.

For example, removing the plastic light switch or receptacle covers reveals an ideal hiding spot for small evidence.

First responders can be a homicide detective’s worst nightmare!

Was evidence disturbed or altered when first responders arrived at the scene? Did they open or close windows and doors? Did they walk through blood or other body fluids?

Investigators must determine if the body has been moved by the suspect. Are there drag marks? Smeared body fluids? Transfer prints? Is there any blood in other areas of the scene? Is fixed lividity on the wrong side of the body, indicating that it had been moved after death

Does the victim exhibit signs of a struggle? Are there defensive wounds present on the palms of the hands and forearms?

Okay, back to the blood found at the scene. Your detective has detected a bright red and wet substance spattered across a bedroom wall. The victim ju jour is spread eagle on the floor beneath, obviously dead due to a large gap between the eyes. Therefore, the reasonable assumption is that the material dotted and smeared across the wall is indeed blood. But this must be verified.

The procedure for identifying the red, wet substance is not like we see on television.

Officers do not dig through their crime scene kit to pull out a UV light, shine it on the red drops and drips and then turn toward the camera to say, “It’s blood. Type O. She consumed orange juice and a ham sandwich three hours before a left-handed shooter, probably the waiter at the Golden Horseshoe Lounge, popped a cap into her oval-shaped head. I know this, TV viewers, because I magically saw the DNA and it’s a match for all of the above. I’ll be available for autographs later tonight in the lobby of Bucky Bee’s Motor Lodge out on Route 66.”

For starters, unlike saliva and semen, blood doesn’t fluoresce under UV light. Instead, the appropriate light source for viewing (and photographing) blood evidence is an infrared light source. Infrared light is at the wavelength between visible light and microwave radiation. It is invisible to the naked eye.

To avoid altering, contaminating, or destroying blood’s usefulness as evidence, a savvy detective must first determine the reddish-brown substance is blood and not spilled, leftover pasta sauce. To do so, investigators conduct a simple presumptive test such as the Leuco-Malachite DISCHAPS test. This is a field test kit that contains chemical filled ampoules that, when exposed to the evidence, displays an intense blue/green color reaction in 3 seconds if blood is present.

Remember, swab a small sample for testing. Do NOT destroy the entire piece of evidence by exposing it to the testing material. Test only the swab!!

Now that your protagonist has determined that blood is present, the next step is to photograph the evidence/area where blood was found.

Luminol, the chemical used to detect blood at crime scenes, reacts with the iron in hemoglobin. It emit a blue glow that can then be photographed as evidence. It’s helpful with locating the presence of blood even after the place has been thoroughly cleaned. However, it has its limitations because the chemical dilutes blood to the point where DNA is destroyed.

The use of various filters on infrared cameras helps to reveal evidence that can only be seen with specific areas of the infrared spectrum. For example, when capturing images of blood, filters coated with a protein that is found in both egg whites and blood plasma—albumin—are often used.

Other filters are available to detect drugs, fingerprints, and explosives.

Bone fragments and teeth are visible using both UV and blue light. Crack cocaine also fluoresces under blue light.

Those of you who attended the fabulous presentation by Sirchie at the 2018 Writers’ Police academy saw the use of these demonstrated in real time.

To recap in simpler terms:

  • Examine the crime scene visually before entering.
  • Visually inspect the areas above, below, and around so as to not miss evidence that may otherwise go undetected. Looks in odd places!
  • Conduct your search in a methodical manner. Be patient.
  • Identify possible bloodstains
  • Use presumptive test kits to determine if stains are indeed blood and if they’re from a human.
  • Do NOT destroy am entire stain during testing. Use a swab to capture a small sample and then test the swab, NOT the entire stain.
  • Make certain to preserve portions of the blood sample for other testing—DNA, etc.
  • Use proper light sources for locating and photographing blood.
  • Blood does not fluoresce under UV light.
  • The appropriate light source for viewing (and photographing) blood evidence is an infrared light source.
  • Filters coated with albumin are used for photographing blood. Other filters are also available.
  • Sirchie is the Global Leader in Crime Scene Investigation and Forensic Science Solutions; providing quality Products, Vehicles, and Training to the global law enforcement and forensic science communities.

*Remember the name “Sirchie” because you’ll soon be hearing more about them. Very, very soon. The news is exciting!


A Murder.

No known suspect.

Evidence collection.

Let’s run down our checklist to be certain we’ve gathered everything because, as you all know, the crime-solving clock is ticking nonstop and valuable time is slipping away, and so is the killer.

Let’s see, we’ve got fibers, bullet casings, fingerprints, weapon, clothing, glass fragments, shoes, shoe and tire impressions, photographed everything, and … “Hey, somebody catch that mosquito. We need to take it in for questioning. It may know something.”

CSI Frank the Fingerprint Guy rushes out to the official CSI van to grab the Handy-Dandy Mosquito-Catching Net 700 (the model one-up from the 600 series) and sets out on the mission of snagging the elusive biting bug.

It’s on the ceiling. Now the wall by the light switch. Back on the ceiling, on the curtains, the window, the blinds, the ceiling again, and now … Got It!

Frank the Fingerprint Guy gently transfers the bloodsucker into a container that’s safe for transport and then off they go to the lab to see what this little guy can tell them about the crime of murder. Who knows, the insect may even be able to provide the name of the murderer.

That’s right, mosquitos are indeed able to spill the beans about a criminal’s identity, and here’s how.

First, what is it that so many jurors like to hear about? Yep, DNA.

You can talk until you’re blue in the face about all the fancy footwork and door-knocking and interviews and bullet trajectory, and more, but that’s not what makes jurors salivate like they do when they hear you found the suspect’s DNA at the crime scene. That’s the golden goose. The bestest prize what there ever was. DNA. DNA. DNA. Give ’em D-freakin’-N-A!

And what is that mosquitos enjoy more than buzzing around the ears of evening picnickers? Yes, feeding on human blood! And what’s found in human blood? Yes, DNA! Ding, ding, ding, we have a winner!

Scientists have learned that blood extracted from mosquitoes remains viable for DNA analysis up to two days after feeding. Therefore, a savvy crime scene investigator could save the day by simply catching mosquitos found flitting about at crime scenes.

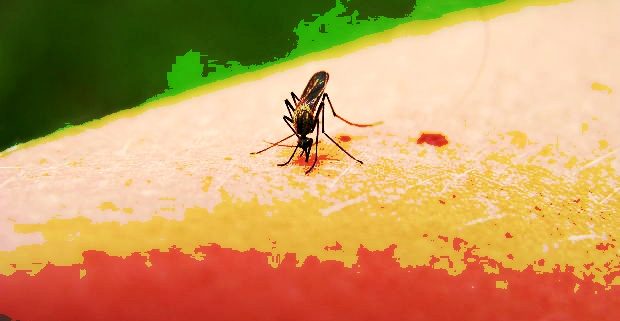
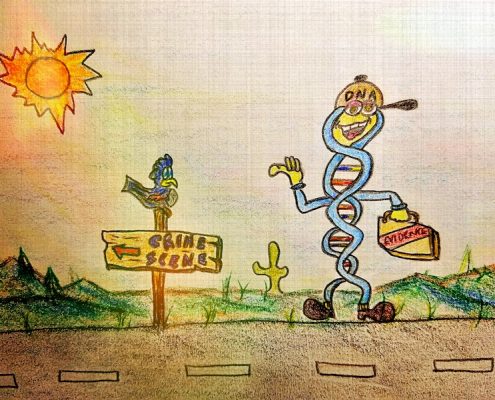
A quick DNA test of the blood found in the belly of the bug could quite easily reveal the name of the killer (if his information is in the system), and how cool would it be to bring in Mr. I. Done Kiltem and notice he has a fresh mosquito bite on his cheek? I know, right?

At the very least, the DNA test could tell police who was at the crime scene. Might not be the killer’s blood in the bug’s belly, but it could be that of an accomplice or witness or someone who could help establish a timeline. Either way, Bug Belly Blood could prove to be a bit of extremely valuable evidence.

Imagine the headline …

Bandit Bagged By Bug Belly Blood

Unfortunately, the window for DNA testing of blood in a mosquito’s gut is limited to two days because the blood is completely digested by day three.