There’s more to evidence collection than merely bagging and tagging bloody clothing and spent bullet casings. Crime scene techs are highly trained, skilled members of police agencies and forensic laboratories who more often than not provide the keys to solving cases.

In the “good old days,” many officers, including patrol officers, collected their own evidence (some still do, especially in smaller departments). They plodded into and poked around crime scenes, determining what items they thought might be of some value and then tossed those things into some sort of container—a grocery bag, department envelope, cardboard box, and even the cellophane wrappings from cigarette packs. In those days there wasn’t a lot of consideration for sterility, and DNA hadn’t yet made its way on the “scene.”

When investigators finally discovered plastic sandwich and ziplock bags you’d have thought they’d won the lottery, because packaging evidence had suddenly become a breeze. The problem with those new-fangled containers, though, was that detectives were placing everything in them, not knowing they could be destroying or damaging evidence instead of preserving it. And that brings us to the question of …

Paper or Plastic?

There’s a simple rule of thumb for deciding which type of evidence packaging—wet evidence goes in paper containers (wet evidence can degrade if placed inside plastic containers) and dry evidence goes in plastic. Items that could be cross-contaminated must be packaged separately. There’s a rule of thumb for other types of evidence, too, and here’s a handy list for the proper packaging of those items.

Hair – Double packaging in paper is best. However, if the hair is completely dry, plastic will work in a pinch. Hairs recovered from different locations must be packaged separately and labeled accordingly. Tape all packaging seams.

Fibers – Dry, and tape-lifted, fibers may be placed inside plastic containers.

Rope, twine, and other cordage – Paper or plastic.

Paint chips – Place inside folded paper. Then place the paperfold inside an envelope.

Tools – Paper or cardboard.

Tape – Wear non-powdered gloves when handling tape. Submit samples inside plastic. If the tape is stuck to an item the item must be submitted with the tape still attached. Do not remove the tape!

Glass – Wrap in paper. Smaller pieces may be placed inside appropriate size cartons.

Arson and other fire evidence – Airtight metal containers. Unused paint cans work best.

Dried stains – Wrap stained item in paper or place inside cardboard box. Large items – moisten swab with distilled water, swab the stain, and package in paper or cardboard after drying.

Blood – Allow to air dry and then package in paper.

Evidence drying lockers

DNA – Do NOT use plastic!
And when I mentioned that wet evidence is packaged in paper containers I did NOT mean to pour liquids into paper bags. Instead, items that contain wet evidence (bloody and/or semen-stained clothing, etc.) should be placed into paper containers.

Detective Sergeant Carl Catchemall studied the bloodstain pattern on and next to the ticking cow clock hanging on the kitchen wall. He stood there, staring, for what seemed like an eternity before turning toward his partner Hank Handsup. Then he tipped his bald, oval-shaped head back toward “the cow wall” where reddish splotches and dots of once-oozing blood contrasted sharply against the freshly painted, snow white surface. The cow’s tail moved from side to side with each tick and tock of the timepiece.

Tick Tock …

“I believe, Hank,” said the wise detective, “that our killer was right-handed, shorter than your own meager five-and-a-half feet, and was standing, not sitting, quite close to our victim, poor Mrs. Ima Ghostnow, when he pulled the trigger on what was most likely a revolver. That, my friend, is what I believe happened to our unfortunate victim.”

Tick Tock …

In the real world, to reach such a solid conclusion, it’s a must that detectives conduct a comprehensive bloodstain evidence investigation, using proper tools, techniques, supplies, equipment, and training. And, of course, experience always helps.

A good bloodstain training class typically uses actual blood, because nothing else accurately mimics the real stuff. Although, a decent substitute for the real deal is a mixture of Karo syrup and red food coloring.

During training classes students are exposed to nearly every type real-life scenario imaginable, but the first order of business is to learn the basics—characteristics of a blood drop.

Characteristics of a blood drop

– blood drops are formed by gravity

– blood drops cannot break apart unless contacted by an outside force

– larger drops travel further than smaller drops (due to mass, not size)

– blood drops always travel in an arcing path (impact injuries)

– size ranges from a few millimeters to few centimeters

– volume of a drop of blood is in direct proportion to whatever it’s dropping from (ax, stick, arm, leg, etc)

Crime scene investigators typically measure bloodstains that hit surfaces on the way up, not stains made by blood that’s on its way back down. Stains made when traveling upward are much more accurate for use as evidence because gravity is not as much of a factor in the pattern’s formation.

Types of Bloodstain Patterns

Impact – caused by high-velocity or medium-velocity wounds—gun shots or blows by an object such as a baseball bat or hammer.

Swipes (Wipes)Caused by a bloody object being wiped across another surface. These stains are the reason for changing the name of the examination from “blood spatter” evidence to “bloodstain” evidence (not all patterns are caused by airborne drops of blood).

*Remember, terminology could and often does vary from one area to the next.

The Lingo

Cast-Off– Caused by slinging blood off objects in motion (a swing of a bloody hammer, or arm).

Drip and Flow– Caused when blood drops off one object onto another.

Projected– Caused by arterial spurts. Often seen in stabbings and cuttings.

The ability to effectively interpret bloodstain patterns is a science and an art. But, before investigators can dive into a crime scene, they must learn a bit of terminology, such as:

Angle of Impact– the angle formed between the direction of an individual drop of blood and the surface it strikes.

Back Spatter– blood that’s directed back towards the source of energy, such as a hand holding a firearm, or hammer.

Expirated blood – blood that’s forced from the mouth or nose where air (exhalation) is the propellant.

High Velocity Impact Spatter (HVIS)– bloodstain pattern caused by a high velocity impact, such as those caused by gunshots or fast moving equipment or machinery (saws, drills, etc.)

Point of Convergence – the point (two dimensional) where the direction of travel (blood droplets) intersect. Can be used to help determine where the victim was standing when the fatal injury was delivered.

Point of Origin –the point (three dimensional) where the direction of travel (blood droplets) intersect.

Stringing – a method used to determine the point of origin. Investigators tie strings at the blood drops, following the direction of travel. The point where the strings intersect is the point of origin. Lasers are sometimes used in lieu of strings.

Stringing You Along!

So what are the tools needed to conduct a proper investigation of bloodstain evidence? Well, for starters …

Luminol

Luminol is a chemical that exhibits a bluish-white glow (chemiluminescence) when mixed with an appropriate oxidizing agent. It reveals the presence of iron in hemoglobin, even in the slightest traces of blood found at crime scenes. In fact, Luminol is capable of detecting blood even if it’s been cleaned away, and in situations where the scene has been altered to the point where there’s no indication that a crime was committed. The older the stain the more intense the reaction will be. By the way, Luminol is not recommended for use on visible or wet blood, and the area must be photographed prior to it’s use because the glow tends to fade quickly.

Photo – Sirchie

When your fictional detectives find themselves searching a property with hopes of locating blood evidence, here are some places they should look: kitchen and bathroom sinks and their drains. The same for tubs and toilets. The cracks between moldings and walls and floors, and at the base of tubs and toilet tanks, drains, cracks and crevices of wood. In addition, tile floors, grout, carpeting (beneath carpeting, especially if the carpeting appears to have been freshly cleaned), dirty laundry, hampers, bedding, ceilings, lampshades, beneath table tops and chairs, mops and mop buckets, sponges, door handles and knobs, knife blocks and, well, the list is as broad as the imagination allows.

When using Luminol to detect the presence of blood, it’s best to turn off all lights before applying it to the suspected/targeted area.

Keep in mind that chlorine bleach flashes brightly when contacted by Luminol. This is a sign that someone may have attempted to clean the area. It’s also important to note that iron and copper particulates will react with Luminol, giving a false positive for a suspected presence of blood. As always with presumptive testings (drugs, etc.), a laboratory test is required for confirmation or exclusion.

Other false positives for Luminol include iron and copper particles. Luminol is a blood search tool, and suspected blood areas must be confir

Luminol has been found to deteriorate DNA evidence, therefore DNA evidence should, if possible, be collected and preserved prior to the use of Luminol or similar products, such as BLUESTAR.

Photo – Sirchie

BLUESTAR is also used to determine the presence or absence of blood. However, what sets BLUESTAR apart from Luminol and other blood reagents is that its use doesn’t require total darkness, nor does it deteriorate DNA. Another benefit to BLUSTAR use is that the color, intensity and duration differs from that of Luminol. Therefore, investigators are less likely to confuse blood and false positives.


Bloodstain Pattern Investigations at the Writers’ Police Academy and MurderCon

This fall at MurderCon, instructor David Alford is scheduled to present a fantastic and wonderfully detailed hands-on class about bloodstain pattern investigations, called The Art of Blood. Here’s a “first look” at the workshop.

“Violent crimes and accidents frequently involve the interpretation of blood evidence. This class offers the attendee the opportunity to learn how to determine the velocity and angle in which a bloodstain impacted a surface, and the 3-dimensional point of origin – where injury or bleeding event occurred . The instruction will include presumptive testing techniques of stains thought to be blood, as well as, searching crime scenes for latent blood with luminol when circumstances dictate that the area was cleaned by the perpetrator. Attendees will participate in hands-on activities to reinforce the learning objectives.”

About MurderCon/Sirchie instructor David Alford:

David Alford is a retired FBI Special Agent with 21 years of experience investigating violent crimes, terrorism and other cases. He was one of the founding members of the FBI Evidence Response Team(ERT)and conducted crimes scene searches on domestic and international violent crimes and bombings, including the Polly Klaas kidnaping and murder, the Unabomber’s cabin and the 9/11Pentagon scene.

He worked in the Denver and San Francisco field offices and completed his career at Quantico in the FBI Lab ERT Unit.During the 6 years in the FBI Lab, he was primarily responsible for overseeing and teaching basic and advanced crime scene courses throughout the US and many other countries. In the 6 years before the FBI, he was a Forensic Serologist, Hair and Fibers Examiner and Bloodstain Pattern Analyst for the Kentucky State Police Crime Lab.After retirement, David taught crime scene courses around the world on behalf of the FBI and US State Department.David has been with Sirchie as an instructor and sales representative for Sirchie’s RUVIS and ALS products for the last 10 years.David loves teaching and allowing students to learn through hands-on training.


Below, 2018 Writers’ Police Academy instructor RJ Beam details bloodstain patterns and why how they’re formed.


Speaking of MurderCon, there’s a murder to be solved there and it’ll be up to you to crack the case by using clues and evidence gained and gathered at the event. Oh, my, it’s going to be a “killer”!!

Details to be announced when the all new website goes live later this week. Registration is scheduled to open this month. Sign up date also to be announced later this week.

It’s exciting, and due to the new format space is extremely LIMITED. So be ready!!

Writers’ Police Academy presents MurderCon


Can’t seem to find the right clues for your current work-in-progress? Well, here’s a handy guide to help with locating DNA evidence.

  1. Undergarments (boxers and/or briefs, etc.)
  2. Sweat-stained clothing
  3. Semen stains on clothing, bedding, skin and other areas of the body
  4. Pages of books and magazines
  5. Drinking cups
  6. Glass (window panes, mirrors, etc.)
  7. Ear wax
  8. Fingernail clippings/beneath attached nails.
  9. Used towels
  10. Urine
  11. Used stamps
  12. (Inner) cheek swabs
  13. Hair (with root is best)
  14. Dried blood
  15. Whole blood
  16. Chewed gum and similar candies/food items
  17. Dental floss and toothbrushes
  18. Cigarette butts
  19. Used tissue
  20. Dried skin, including dandruff and psoriasis
  21. Used razors
  22. Furniture (couch cushions, mattresses, and more)
  23. Carpeting
  24. Computer keys and mouse
  25. Used/worn stocking masks, gloves, mittens, caps, socks, pants, shirts, etc.

By the way, the odds of two people having the same 13 point DNA profile is approximately 1 in 1 billion. And…

Investigating a murder can be, and often is, a methodical and meticulous slow-grind of information gathering. It’s knocking on many doors, speaking with countless numbers of people, digging in the dirt and leaves and mud, pawing through mounds of garbage, searching through closets and hampers filled with grimy and disgusting clothing. It’s collecting solid bedding and mattresses, stained underwear, and body fluids. It’s hours and days and months and years of clue-chasing rollercoasters that seem to go round and round and round and up and down and back again. All to catch a person who ended the life of another human.

In the end, it’s extremely satisfying to ratchet cuffs around the wrists of a suspect who used a weapon of some type to kill. All that hard work coming to a close leaves an investigator with a combined sense of relief, success, and satisfaction that they’ve help bring a small bit of closure for surviving family members.

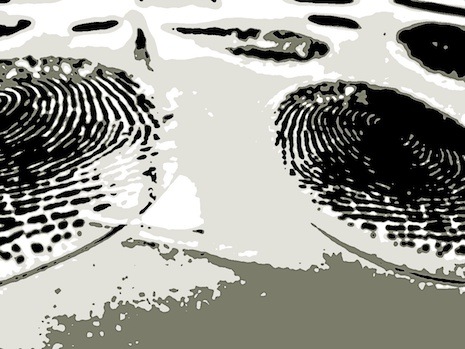
Sometimes, even though mountains of potential evidence piles up during an investigation, it’s the tiniest bit—a trace—such as a carpet fiber, that serves as the cornerstone of a case. And such was the key element that helped Delaware investigators nab a serial killer known as The Corridor Killer.

A dark and story night

As it’s been said to not be said, it was a dark and story night on November 29, 1987, when 23-year-old ex-prostitute Shirley Ellis hoped to to catch a ride into Wilmington by hitchhiking along Route 40 near Bear, Delaware. She was on her way to deliver a Thanksgiving dinner for an AIDS patient who was undergoing treatment at Wilmington Hospital.

At approximately 9:25 p.m. that evening, a teenage couple pulled into a popular make-out spot to do the things teenagers do in those types of secluded locations. It was then that they discovered Ellis’ partially clothed body. Her legs were spread apart and autopsy later revealed evidence of torture and mutilation—she’d been bound at the feet and the ankles and scraps of black duct tape were still attached to strands of her hair. It was likely that the tape had been used to prevent her from screaming. She had not been sexually assaulted.

Seven months later, on June 28, 1988, Catherine DiMauro, a 31-year-old woman with a history of prostitution arrests, was walking along Route 40, near Bear, around 11:30 p.m. It’s not known if she was soliciting customers or simply using the route to go from point A to point B. But it was that night when she accepted a ride from a man driving a blue van. Her nude body was discovered by workers building a nearby apartment complex. Her wrists and ankles were bound and, like Ellis, duct tape had been used to silence her. And again, like Ellis, there was no indication of sexual assault.

This time, though, a vast amount of blue carpet fibers were found on DiMauro’s body. Finally police had a clue. A minor clue. But a clue. And the police were all over it. They assembled a 60 member task force with access to airplanes, helicopters, rental vehicles, and an unlimited budget. No stone or fiber was to be left unturned or untested.

The task force consulted with the FBI’s Behavioral Science Unit in Quantico, Virginia, and they concluded that these acts were the acts of a serial killer.

The team decided to send out undercover female police officers dressed as prostitutes to walk the stretch of Route 40 where the killer had picked up the victims. They flirted with the men who stopped, and there were several, but they never got into a vehicle. In the meantime testing was underway to identify the blue fibers found on DiMauro’s body. Without fibers to use for comparison, however, these blue pieces of evidence would remain on hold.

On Aug. 22, a prostitute named Margaret Lynn Finner went missing. She was working the streets along U.S. 13, near the stretch of Route 40 connected to the crimes of the serial killer. Finner was last seen climbing into a blue Ford panel van with round headlights. The van was driven by a white male.

Roughly three months later, Finner was found dead near the Chesapeake & Delaware Canal. Due to the advanced stage of decomposition a cause of death couldn’t be determined. No clues were found and no one was charged for death.

Undercover Ops Begin

On Sept. 14, 1988, a 23-year-old New Castle County, Delaware undercover officer dressed as a prostitute headed out to walk the Route 40 corridor, hoping to snare the killer. It wasn’t long before a line of 5 or 6 vehicles lined up on the side of the road. The drivers of those vehicles included doctors, lawyers, schoolteachers, and they all wanted to talk to “the prostitute.”

But the vehicle that caught the undercover officer’s attention was a blue Ford panel van with round headlights that drove past. Her cops’ alarm bells sounded loudly inside her head when the van stopped a little farther down the road and turned around to make another pass. The driver of the van repeated the action, driving past and then U-turning, seven times within a twenty-minute period.

The officer walked to a more secluded area, hoping to tease the driver into stopping. Finally the van pulled over and a white male opened the side panel. The officer immediately saw blue carpeting covering the van’s interior. She later said the man was different than any other person who stopped for her. His demeanor was cold and he was difficult to engage in conversation. He seemed to stare through her.

The Blue Fibers

While talking to the man, the undercover officer used the time and distraction to rub her hand on the carpeting, pulling out a few blue fibers for testing. The driver, though, demanded that she get in the van, but she refused, saying that she tired from partying and needed to sleep. The man gave up and drove away. A task force member in the area recorded and ran the plate numbers on the van. It was registered to Steven Brian Pennell, a Delaware electrician. His record showed no arrests.

Police sent the blue fibers were sent to a lab for testing. In the meantime, on September 16, Michelle Gordon, a 22-year-old known prostitute was seen on Route 40 climbing into the passenger side of a blue Ford panel van. But there was a witness and she knew both Gordan and Pennell, and she recognized Pennell’s van

This time, however, police caught a major break. The lone witness to the abduction knew both Gordon and Pennell, and she immediately identified the vehicle. Sadly, Gordon’s body was found four days later when it washed up on the banks of the Chesapeake & Delaware Canal on Sept. 20. Gordon died while being tortured.

Three days later, 26-year-old Kathleen Meyer was last seen alive hitchhiking along Route 40 around 9:30 p.m. This time the witness was an off-duty police officer who saw Meyer accepting a ride from a man driving a blue Ford van. The officer ran the plates and learned the vehicle was registered to Pennell. Meyer’s body was never found.

After having to wait for evidence (carpet fibers) to be processed and Delaware Attorney General Charles Oberly to approve a search warrant for Pennell’s van, police took matters into their own hands and pulled Pennell’s van over for a routine traffic violation. This allowed them to take Pennell into court to pay his ticket.

Icing on the Investigatory Cake

In the meantime, officers searched the van and immediately discovered carpet fibers that matched those on the victims. They also found hair and blood and even the same brand of duct tape used to silence DiMauro. The icing on the investigatory cake was Pennell’s gruesome “torture kit”—pliers, needles, a whip, handcuffs, knives and various types of restraints.

Police had their suspect.

Pennell opted to remain silent and did not offer a statement.

The blue carpet fibers were indeed the cornerstone of the entire case against Pennell. Without them, the state’s case could not have moved forward because any other actions and evidence would have been ruled as fruit of the poisonous tree.

So, of course the defense attorney attacked the fibers, stating the officer did not have a legal right to remove those fibers from the van without a search warrant. However, Superior Court Judge Richard Gebelein denied the defense claims and ruled that the carpet was in plain view once Pennell opened the door to invite the undercover officer inside the van.

Justice Arrives

On November 23, 1989—Thanksgiving Day—as a massive snowstorm blanketed the area, Pennell was convicted of murdering Ellis and DiMauro. The jury, however, deadlocked on the Gordon case. They also deadlocked on the death penalty.

In 1990, Pennell was sentenced to two life terms in 1990 and, as a result, Pennell filed appeals, alleging that the fiber seizure was unconstitutional. During this time, police continued their investigations and, based on new evidence, Pennell was indicted for the murders of Meyer and Gordon. Pennell asked the court if he could be allowed to represent himself for the new charges. The court granted the motion.

Pennell then did the nearly unthinkable. Even though he did not offer a confession, he pled no contest to both murders and asked the Superior Court to impose a sentence of death.

At a hearing to determine if Pennell’s life should be spared, Pennell offered a bizarre argument for his own death –  “‘The law was developed from one book, and it’s that book I quote from,” he said. “‘In Numbers, chapter 35, verse 30, ‘Whoever kills a person, the person shall be put to death.’ “‘Also, in Genesis, chapter 9, verse 6, ‘Whoever sheds man’s blood by man, his blood shall be shed.'”

“This court has found me guilty on the testimony of witnesses. So I ask that the sentence be death as said by the state’s laws and God’s laws. That’s all I have to say.”

Perhaps it was both fitting and somewhat spooky that, on Halloween day in 1991, Pennell was sentenced to death. As part of Delaware’s mandatory death penalty appeal process, Pennell appeared before the to the state Supreme Court court on Feb. 11, 1992, where he again asked for his own execution. He remains the only person to represent himself before the state Supreme Court, and the only one, of course, to ask for death.

During the entire case, Pennell always referred to himself in the third person. Never in first person.  During the appeal, Pennell said to the court, “The perpetrator must have sensed a pleasure in the killings. Since he did not commit just one, but continued in the same depraved manner on the others, this pleasure is evident.”

On March 14, 1992, Steven Brian Pennell was the first man executed in Delaware in 46 years.

Pennell died by lethal injection, and as a result of a savvy undercover police officer who thought to grab a couple of tiny blue carpet fibers.


“Yes, Sam, you heard me correctly. The murder weapon was indeed a wisecracking, bucktooth bunny.”

“Don’t be silly, Daffy. I can’t imagine how she could bludgeon the man to death using a long-eared galoot.”

“No more speculation, please,” said the famous cartoon duck. “Here’s how she did it …”

Tularemia

Tularemia, or rabbit fever as it’s commonly called, is no stranger to the United States. After its discovery in 1911 in Tulare, California, the disease became known as a killing machine. It killed a large number of ground squirrels before finding its way into human bodies where it infected hunters and other outdoorsmen, and any others who came into contact with infected animals.

Today, the Center for Disease Control (CDC) reports roughly 200 cases of Tularemia (Francisella tularensis) each year in America. Only about two percent of those cases are fatal. However, since it is possible to transform the tularemia microbe to an aerosol form, the plague-like disease could be used as a very effective biological weapon.

Killers in mystery novels might find tularemia a most effective way to murder their victims, since pathologists and toxicologists do not routinely screen for it during autopsy. And, Tularemia is not easily detected by doctors.

Tularemia-carrying organisms are readily found in wild animals—particularly feral rabbits—in their feces. It’s also found in water and mud. Humans can contract tularemia by handling the hides, paws, or flesh of wild rabbits. They can also catch the disease by eating undercooked rabbit meat. Ticks, mosquitoes, and deer flies can transfer the sickness to humans through their bites.

A hunter with an open cut or wound can contract tularemia simply by skinning a rabbit. A murderous spouse could introduce the bacteria into her unsuspecting hunter-husband’s food (Tularemia-tainted meat), then blame the death on the infected rabbits the sportsman shot during his hunt. The wife could easily explain the symptoms away until her husband was too far-gone for medical help.

The disease offers a variety of symptoms, depending upon the way it is introduced to the victim. Inhaled tularemia, the method most likely to be used by terrorists, presents flu-like symptoms—fever, chills, loss of appetite, cough, and headache. Swollen lymph nodes, skin ulcers, and pneumonia can accompany these symptoms.

Certain strains of tularemia are currently incurable because they have been genetically engineered to be antibiotic-resistant. This disease, though deadly, cannot be spread by human-to-human contact.

The use of tularemia in germ warfare is not new to the military. In 1932 and again in 1945, the Japanese studied using tularemia as a possible biological weapon. Thousands of Soviet and German soldiers serving on the Eastern front during WWII succumbed to tularemia. There is some speculation that the disease was introduced to them intentionally.

The U.S. also developed and stockpiled tularemia (by freezing). The military conducted tests on the agent (code named Agent UL) by spraying barges containing monkeys in the waters off Hawaii. The spray was introduced by aircraft over several miles. As a result, over half the monkeys were infected with tularemia. Approximately half of the infected monkeys died.

An American fell ill with Tularemia when he ran over an infected rabbit while mowing his lawn. It was this instance that cemented the fact that tularemia could be contracted by inhalation. In 2000, an outbreak of tularemia occurred on Martha’s Vineyard. The cause of the outbreak .. lawn mowing. In 2003, a Nantucket maintenance worker ran over an infected rabbit with his lawnmower, however, it was not he who contracted the disease. Instead, it was a co-worker who used a stick to remove the animal to nearby bushes.

Terrorists could transmit the bacteria either in food or by an aerosol propellant. Large numbers of people could be infected at once with only a microscopic amount of the bacteria.

So, what have we learned from all this? That’s right, be vewy, vewy quiet when hunting wabbits …

Detective Pete Gitterdone had a spotless attendance record, never missing a day for sickness during his entire thirty-three years with the department. He was so proud of his achievement, in fact, that he refused to stay at home on this particular day, a time when his fever hovered at 102.

Coughing and sneezing fits forced him to spend the majority of the morning with his mouth and nose buried deep into a crumpled, crud-dampened, and extremely yucky handkerchief.

Gitterdone, feeling all achy and fatigued, was busy collecting suspected blood samples (brownish red stains for the official record) at a particularly brutal homicide scene, alternating between hacking and achooing, when his partner, Detective I. Lergictowork, told him he looked sickern’ a dog, like death warmed over, and asked if he needed a break.

Gitterdone promptly turned his head away from his partner and fired off a round of wet sneezes directly into the large paper bag of already-collected evidence. “No,” he said. “I’ll be okay. Besides, I’m almost done. Just a couple of prints to lift and I’m outta here.”

He tipped his head toward a desktop where a few sheets of yellow legal pad paper sat among a scattering of pencils, pens, and colored paperclips. “Looks like the suspect might’ve touched these papers,” he said. “How ’bout handing me a can of Ninhydrin. There’s one in my kit.”

Ninhydrin reacts with amino acids to produce a purple reaction product called “Rhuemann’s Purple”. It is useful on porous surfaces—especially paper. ~ Sirchie

So, did you notice anything particularly wrong with Gitterdone’s method of evidence collection? If so, what?

After watching these two work, well, it might be a good idea to have both Gitterdone and Lergictowork read this list of Crime Scene Do Nots. It might help to have your protagonist take a peek as well.

Crime Scene DO NOT’S

1. Do Not blow away excess fingerprint powder! Doing so adds your DNA to the surface.

2. Do Not use Styrofoam to package electronic devices (computer parts, etc.) because it can cause static charges. Instead, use foam padding or bubble-wrap.

3. Do Not alter or add anything to a crime scene sketch after leaving the scene. Memories are not quite as accurate as we may think.

4. Do NOT place bloodstained evidence in plastic bags. Plastic bags and containers can serve as incubators for bacteria, which can destroy or alter DNA. Rule of thumb – paper bags/containers for wet evidence (blood, semen, saliva, etc.) and plastic for dry evidence.

5. DO NOT collect DNA evidence samples (saliva, blood, etc.) from a criminal suspect without a court order, the suspect’s consent, or during exigent (emergency) circumstances.

6. Do NOT cough, sneeze, exhale, etc. over any evidence sample. This also includes talking over a sample. With each word spoken comes your DNA that’s instantly transferred to the sample.

7. Do NOT fold wet documents. Leave that to the professionals in the lab.

8. Do NOT use fingerprint tape or lifters to collect bits of trace evidence. The adhesion on print lifting tape is insufficient for picking up tiny bits of evidence.

9. Do NOT use dirty digging tools when collecting soil samples. Always clean tools thoroughly after each use to avoid cross contamination.

10. Do NOT use fingerprint lifters in lieu of gunshot residue (GSR) collection materials. (see number 8 above)

441

Fingerprint lifter – Sirchie image. I used Sirchie lifters all the time during my career. In fact, I still have a few leftover from my crime-solving days.

11. Do NOT allow shooting suspects, victims, witnesses, etc. to wash their hands or rub them against other surfaces until after GSR tests/collection have been completed.

12. ALWAYS remember #6 – Do NOT cough, sneeze, exhale, talk, etc. over any evidence sample.
Hapci-fr


Bonus – Transferred Prints

Do NOT write a transferred fingerprint scene without first giving it a ton of serious thought. Here’s why:

Yes, it is indeed possible to transfer a fingerprint, even accidentally. However, a skilled examiner should be able to spot duplicates since they tend to appear very thin and thready. Also, the background area surrounding the “new” print may not match the surface of the place where the transferred print was left. Background pattern(s) transfer along with the print.

Here’s where writers often make their mistakes when setting up characters to “take a fall” for another character. Transferred prints are mirror/reverse images and would be easily recognized by a skilled examiner. It’s possible, though, that an inexperienced print examiner, one who’s new to the field, may not catch it right away. But that scenario is highly doubtful.


BIG, BIG, BIG Writers’ Police Academy news is on the way. The 2019 WPA is a special event, one unlike anything we’ve presented in the past. And when I say special, I mean it’s over the top S.P.E.C.I.A.L.! I am so pleased and thrilled to present such an exciting opportunity for writers. This has never been done before, not ever!

For now, though, I’d like to share the dates and the location so you can make plans to attend. Please keep in mind that due to the nature and location of this unique program space/slots are limited. We’ll soon begin to announce more specific details but, for now …

Date – August 1-4, 2019

Location – Raleigh, N.C.


Have you ever read what you thought was a fantastic book, the kind that forces us to read into the wee hours of the morning, not wanting to stop because the writing is so doggone good? But then on page 1,617, well, there it is, the sentence that makes us scream like the shopper on Black Friday who lost the last 100-foot-flatscreen Kawasaki Supersonic television to the old lady with the great left jab who immediately zipped over to the checkout counter on her suped-up Hoveround with YOUR TV strapped to her back.

Yeah, you know those books. The stories written by the author who figured no one would notice that he didn’t know the difference between a revolver and a semi-automatic pistol. Or that cordite hasn’t been used in the manufacturing of ammunition since the last days of WWII. Yep, those books.

We’ve all heard (over and over and over again) about fake news, right? You’ve even heard me mention the nonsensical reporting so often seen floating around the internet. Well, the use of incorrect firearm and other forensic terminology and information has the same stink to it as does the news reporter who kneels down in a shallow puddle of water to make it seem as if he’s standing in raging floodwaters.

So let’s have a fresh start today and we’ll do so by clearing a bit of the stinky faux pas from our writing. We’ll begin the funk-cleansing by quashing a few details about blood evidence. First, up …

Some writers have their crime-solvers rush into a murder scene while soaking the area with a luminol-filled power washer. They spray and spray until every surface—walls, ceilings, and even the family dog and Ralph the goldfish are dripping with the glowing liquid.

Others, well, their detectives have the uncanny ability to merely look at blood droplets and immediately know its type and what the bleeder had for dinner and the exact time the red stuff spattered the family portrait hanging above the mantle.

You put your left eye up, you put your left eye down.

You put ’em both together and then you look all around.

That’s what it’s all about!

~ Sung to the tune of The Hokey Pokey.

So, as the peppy little jingle above indicates, investigators should always examine a scene visually before taking the first step inside. This includes looking up. See if there are bloodstains there. Any brain matter? Bullet holes? Insects?

Next, the walls and for the same items of evidence and/or clues.

The floor and the body, if that’s where it was found. Of course, the victim should be the first concern. After all, he or she just might still be alive and need prompt medical attention. Oh, and a quick check for the suspect is always a good idea. No need to take a bullet or stab wound in the back if not absolutely necessary. Priorities!

Then look all around, and do examine the smallest of details. Evidence, as any seasoned investigator will tell you, is sometimes found in the most unlikeliest of all places.

Crime-scene searches must be methodical and quite thorough. Every single surface, nook, and cranny must be examined for evidence, including doors, light switches, thermostats, door knobs, etc.

For example, removing the plastic light switch or receptacle covers reveals an ideal hiding spot for small evidence.

First responders can be a homicide detective’s worst nightmare!

Was evidence disturbed or altered when first responders arrived at the scene? Did they open or close windows and doors? Did they walk through blood or other body fluids?

Investigators must determine if the body has been moved by the suspect. Are there drag marks? Smeared body fluids? Transfer prints? Is there any blood in other areas of the scene? Is fixed lividity on the wrong side of the body, indicating that it had been moved after death

Does the victim exhibit signs of a struggle? Are there defensive wounds present on the palms of the hands and forearms?

Okay, back to the blood found at the scene. Your detective has detected a bright red and wet substance spattered across a bedroom wall. The victim ju jour is spread eagle on the floor beneath, obviously dead due to a large gap between the eyes. Therefore, the reasonable assumption is that the material dotted and smeared across the wall is indeed blood. But this must be verified.

The procedure for identifying the red, wet substance is not like we see on television.

Officers do not dig through their crime scene kit to pull out a UV light, shine it on the red drops and drips and then turn toward the camera to say, “It’s blood. Type O. She consumed orange juice and a ham sandwich three hours before a left-handed shooter, probably the waiter at the Golden Horseshoe Lounge, popped a cap into her oval-shaped head. I know this, TV viewers, because I magically saw the DNA and it’s a match for all of the above. I’ll be available for autographs later tonight in the lobby of Bucky Bee’s Motor Lodge out on Route 66.”

For starters, unlike saliva and semen, blood doesn’t fluoresce under UV light. Instead, the appropriate light source for viewing (and photographing) blood evidence is an infrared light source. Infrared light is at the wavelength between visible light and microwave radiation. It is invisible to the naked eye.

To avoid altering, contaminating, or destroying blood’s usefulness as evidence, a savvy detective must first determine the reddish-brown substance is blood and not spilled, leftover pasta sauce. To do so, investigators conduct a simple presumptive test such as the Leuco-Malachite DISCHAPS test. This is a field test kit that contains chemical filled ampoules that, when exposed to the evidence, displays an intense blue/green color reaction in 3 seconds if blood is present.

Remember, swab a small sample for testing. Do NOT destroy the entire piece of evidence by exposing it to the testing material. Test only the swab!!

Now that your protagonist has determined that blood is present, the next step is to photograph the evidence/area where blood was found.

Luminol, the chemical used to detect blood at crime scenes, reacts with the iron in hemoglobin. It emit a blue glow that can then be photographed as evidence. It’s helpful with locating the presence of blood even after the place has been thoroughly cleaned. However, it has its limitations because the chemical dilutes blood to the point where DNA is destroyed.

The use of various filters on infrared cameras helps to reveal evidence that can only be seen with specific areas of the infrared spectrum. For example, when capturing images of blood, filters coated with a protein that is found in both egg whites and blood plasma—albumin—are often used.

Other filters are available to detect drugs, fingerprints, and explosives.

Bone fragments and teeth are visible using both UV and blue light. Crack cocaine also fluoresces under blue light.

Those of you who attended the fabulous presentation by Sirchie at the 2018 Writers’ Police academy saw the use of these demonstrated in real time.

To recap in simpler terms:

  • Examine the crime scene visually before entering.
  • Visually inspect the areas above, below, and around so as to not miss evidence that may otherwise go undetected. Looks in odd places!
  • Conduct your search in a methodical manner. Be patient.
  • Identify possible bloodstains
  • Use presumptive test kits to determine if stains are indeed blood and if they’re from a human.
  • Do NOT destroy am entire stain during testing. Use a swab to capture a small sample and then test the swab, NOT the entire stain.
  • Make certain to preserve portions of the blood sample for other testing—DNA, etc.
  • Use proper light sources for locating and photographing blood.
  • Blood does not fluoresce under UV light.
  • The appropriate light source for viewing (and photographing) blood evidence is an infrared light source.
  • Filters coated with albumin are used for photographing blood. Other filters are also available.
  • Sirchie is the Global Leader in Crime Scene Investigation and Forensic Science Solutions; providing quality Products, Vehicles, and Training to the global law enforcement and forensic science communities.

*Remember the name “Sirchie” because you’ll soon be hearing more about them. Very, very soon. The news is exciting!


Murder: Really bugs me

Many useful items fill an investigator’s toolbox—interrogations, fingerprints, footprints, informants, fibers and, well, the list goes on and on. But there’s one group of extremely important tools that are often overlooked—the squiggly and wiggly and fluttering and flittering and sometimes even slimy crime-solving creatures known simply as, well, bugs.

Yes, we step on them and we swat at them and some people even eat them. But as investigators, in spite of the creepy-crawler’s often stomach-churning menu selections, cops must often sign them on as partners when attempting to solve murder cases. Like detectives who specialize in certain areas—rape, robbery, narcotics, and homicide—insects, too, have their own areas of expertise, and they each arrive at various times during the course of the investigations to do what is it they do best. For example …

Maggots are event crashers by nature. They’re clueless when it comes to dinner party etiquette. In fact, they barge right in on unsuspecting hosts, the dead bodies du jour. Their manners are atrocious, actually. They never bother to wait for bacteria to complete the service settings, the breaking down of complex molecules through respiration or fermentation, before storming the scene.

The tiny and gross little squirmers who eat with one end of their bodies while breathing through the other, are the Animal House-type partiers of death. As disgusting as they are, however, they are useful as tools for solving homicides because …

When investigators find maggots on a body that are in their early larvae stages, when they’re 5mm in length, well, officers then will have a pretty good idea that the victim has been there for only a day and a half, or so.

Even the mere presence of certain insects is quite telling.

Dermestidae Beetles have better things to do than to show up early at parties. They’re a bit snobbish, preferring to wait until everyone else had had their fill—the time when the body begins to dry out—before making their grand entrance, at which time they’ll gorge themselves on drying skin and tendons.

Green Bottle Fly

These guys are the drunk uncles of the party. They show up to first to begin drinking the fluids found in and on decaying bodies. Then, after they’ve had their thirsts quenched they’ll often dive into a hearty meal of decaying tissue.

Green Bottle Fly ~ Calliphoridae

  • One of the first insects to arrive on the scene/body
  • Lays eggs in wounds or openings such as the eyes, ears, mouth, penis, and vagina

Rove Beetles

Rove beetles are late arrivers to the party and this is so because they’re scavengers whose meal of choice is the larvae of other insects, those who lay their eggs in and on decomposing corpses. They’re one of the “buzzards” of the bug world.

Ham Beetles are also scavengers, but they find the tougher parts of the decaying body to be the tastiest, such as skin and tendons.

Rounding out today’s lunchtime guests are the Carrion Beetles. These gourmet insects absolutely adore dining on the larvae of other insects, but also enjoy a scrumptious appetizer of decaying flesh.

Now, please do enjoy your own dinner!


Writers sometimes fail to capture what really goes on beyond the yellow tape at crime scenes. The reasons vary for these unfortunate omissions of solid information, but one theme is common … the use TV or film as research tools. How awful, right?

The little things often go unsaid, even though those details are often quite important!


So what are authors missing when they use television as their sole source of cop-type information?

Well, here’s a six-pack of helpful hints for those characters whose duty is to investigate a crime scene.

1. Death Scene Documentation, Evidence Collection, and Chain of Custody of the Body

Before the medical examiner enters the scene, be sure to preserve any evidence that may be altered, contaminated, or destroyed. You certainly wouldn’t want the M.E.’s footsteps to wipe out the suspect’s shoe prints, alter blood stain evidence, or mar tire impressions. Document the M.E.’s time of arrival, who called him and when, and what time the body was removed from the scene. Also, make note of the seal number placed on the body bag, if a seal was used. If not, note that the M.E. did not seal the bag and have an officer escort the body to the morgue, if possible. This simple act keeps the chain of custody intact.

2. Water Scenes: What’s Important? – Always document the water type (pond, river, lake, creek, etc.). Record the water temperature and the depth of the water where the body was found, if possible. Make note of and photograph the surroundings. It’s possible that the victim had been swinging from the rope hanging from the limb in that large oak tree, slipped, and then fell onto that large rock jutting out of the water. Everything is a clue. Record the position of the body in the water. Was it face down, or face up? Totally underwater, or floating? That could help determine how long the body had been in the water. Follow the clues!

3. Shoes – Everyone entering a crime scene should wear shoe covers. If not, pay particular attention to their shoes. Yours included. Photograph the bottoms of everyone’s shoes so you’ll be able to recognize the tread patterns when comparing impression evidence back at the office or lab.

4. Photograph Impressed Evidence – Always take a picture of impressed evidence (tire tracks, footprints, etc.). If something were to go wrong while you’re processing evidence and you hadn’t photographed before you started … well, you’re, as they say … SOL.

5. Fingerprinting Wet Surfaces – Don’t let a little rain stop you from lifting fingerprints. There are a couple of ways to obtain a good set of prints from wet surfaces—Wet Print, a spray on mixture that develops black prints instantly, and SPR, another spray on product that requires a little mixing before applying.

6. Gloves – Use a different pair of gloves when handling each piece of evidence. This is an important step that prevents cross-contamination. You certainly don’t want to transfer someone’s DNA from room to room, especially if that makes an innocent person appear to have been somewhere he hasn’t! And, it is possible to leave your prints on a surface even while wearing thin, latex gloves. Cotton gloves eliminate this problem.

Angry DNA says, “Wearing gloves helps prevent contamination of evidence.”

In the world of cops and robbers, there are many rules, both written and unwritten. Writers, of course, enjoy the freedom of making things up as their stories progress from one scene to another. However, a touch of authenticity sprinkled throughout the pages can add a nice touch to a well-crafted tale.

Here’s a tasty tidbit that’s a perfect garnish for your next well-baked tale.

To read, simply click the arrows below each page. The right arrow allows you to continue reading. The left, of course, allows you to return to previous pages. As always, thanks for supporting The Graveyard Shift!

*For a different viewing experience, click (at the bottom of the page) on “Hidden Evidence by Lee Lofland,” The link takes you to a place where you can view the entire piece one page at a time without having to scroll at all. For an even better perspective, click on the the little icon that resembles a TV screen. I’m learning, too, don’t worry. Thanks!

Hidden Evidence by Lee Lofland